谷歌身份感知代理提供商
Backstage 允许将验证用户身份的责任卸载给谷歌 HTTPS 负载平衡器&。IAP利用后者的身份验证支持。
本教程展示了如何在坐在Backstage前的 IAP 上使用身份验证。
假设 IAP 已在配置为从后端为前端应用程序提供服务的 Backstage 实例前提供流量。
配置
让我们先添加以下内容auth配置中的app-config.yaml或app-config.production.yaml或类似内容:
auth:
  providers:
    gcp-iap:
      audience: '/projects/<project number>/global/backendServices/<backend service id>'
      jwtHeader: x-custom-header # Optional: Only if you are using a custom header for the IAP JWT
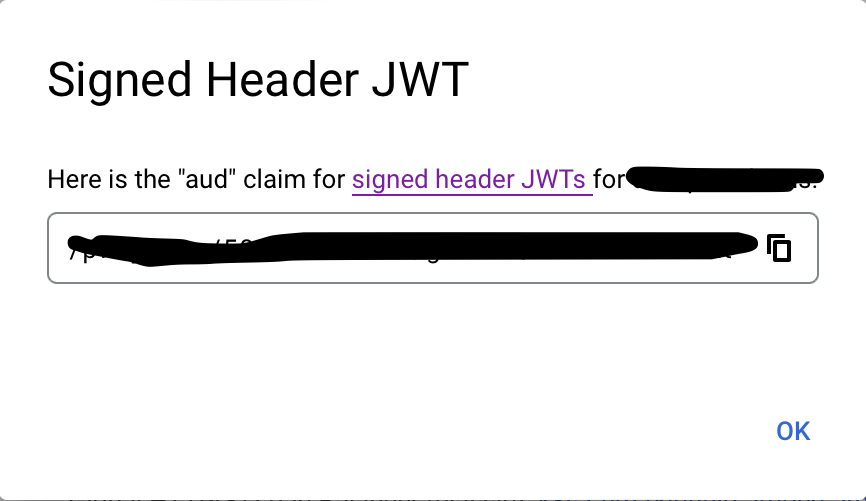
��全文audience可通过访问您的身份感知代理 谷歌云控制台选择您的项目,找到要代理的后端服务,单击 3 个竖点,然后单击 "获取 JWT 受众代码",并从弹出的窗口中复制,如下所示:
要加载提供程序,就必须设置好这部分配置。 现在让我们添加提供程序本身。
后端更改
该提供程序在授权后端代码中并非默认启用,因为除了上述配置部分外,还需要在实际代码中为其提供一个或多个回调,如下所述。
添加一个providerFactories中的路由器条目。packages/backend/src/plugins/auth.ts.
packages/backend/src/plugins/auth.ts
import { providers } from '@backstage/plugin-auth-backend';
import { stringifyEntityRef } from '@backstage/catalog-model';

export default async function createPlugin(
  env: PluginEnvironment,
): Promise<Router> {
  return await createRouter({
    logger: env.logger,
    config: env.config,
    database: env.database,
    discovery: env.discovery,
    providerFactories: {
      'gcp-iap': providers.gcpIap.create({
        // Replace the auth handler if you want to customize the returned user
        // profile info (can be left out; the default implementation is shown
        // below which only returns the email). You may want to amend this code
        // with something that loads additional user profile data out of e.g.
        // GSuite or LDAP or similar.
        async authHandler({ iapToken }) {
          return { profile: { email: iapToken.email } };
        },
        signIn: {
          // You need to supply an identity resolver, that takes the profile
          // and the IAP token and produces the Backstage token with the
          // relevant user info.
          async resolver({ profile, result: { iapToken } }, ctx) {
            // Somehow compute the Backstage token claims. Just some sample code
            // shown here, but you may want to query your LDAP server, or
            // GSuite or similar, based on the IAP token sub/email claims
            const id = iapToken.email.split('@')[0];
            const sub = stringifyEntityRef({ kind: 'User', name: id });
            const ent = [
              sub,
              stringifyEntityRef({ kind: 'Group', name: 'team-name' }),
            ];
            return ctx.issueToken({ claims: { sub, ent } });
          },
        },
      }),
    },
  });
}
现在后端已经准备就绪,可以在/api/auth/gcp-iap/refresh剩下的工作就是更新前端登录机制,以用户的名义通过 IAP 轮询该端点。
前端更改
建议使用ProxiedSignInPage安装在packages/app/src/App.tsx像这样
packages/app/src/App.tsx
import { ProxiedSignInPage } from '@backstage/core-components';

const app = createApp({
  components: {
    SignInPage: props => <ProxiedSignInPage {...props} provider="gcp-iap" />,
  },
  // ..
});
参见使用代理提供商登录部分获取更多信息。